One of the many things I get asked by new users of custom and RIC hearing aids is about changing the wax guards on their hearing aids. Most new users realise that maintenance and cleaning of their hearing aids is an important part of caring for their investment. Changing the wax guard on a hearing aid when needed will save you real money and here is why.
What The Hell Are Wax Guards?
Glad you asked me that, wax guards are little white fiddly plastic yokes sent by the devil to irritate you. Actually, that isn't true, however it sounded funny in my head. Wax guards are designed to protect the receiver (speaker part) of your hearing aid from wax and in the case of advanced wax guards, moisture as well.
Why Geoff Why?
Receivers don't like wax or moisture, if wax or moisture gets into the reciever of your hearing aid it will die an early and horrible death. More importantly, you will now be the proud owner of a piece of plastic that isn't even any use as a paper weight. Until, that is, you have it repaired. Which, depending on whether your hearing aids are still in warranty, may cost you real money (anything over 50 notes is real money to me).
It Pays To Protect Those Hearing Aids
So, it pays to protect your hearing aids, cleaning and caring for them like the huge investment they are. So that means a regular drying, cleaning and care routine and, changing the wax guards.
When To Change The Wax Guards?
Here is where it gets muddy, I am afraid, the answer is how long is a piece of string. Some people have to change the wax guards on an almost monthly basis. Some people can get months out of a wax guard. It really depends on the the amount of ear wax in your ear canal. Which is relatively different from person to person.
How You Will Know The Wax Guard Needs Changing
During your regular clean and care routine (let's pretend you have one) take a good look at the speaker end of your hearing aid. Check your wax guard carefully and see if it has a lot of wax in it. Most wax guards have a series of holes in the cup part of them that are visible to a good eye. If they are blocked, or if you can't see them at all. It is time to change your wax guard. Don't wait for the sound to go dead or weaken, sometimes, that just won't happen until the wax has invaded the speaker part itself.
Let's Talk About Oticon Wax Guards
So there are a range of Oticon wax guards available for both their in ear and RITE hearing aids. Both are in essence similar in nature. Let's take a look at changing them on a custom hearing aid. First get your wax guard pack out, most Oticon packs are circular.
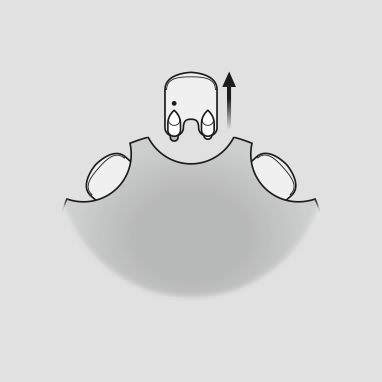
Step 1. Remove the tool from the shell. The tool has two pins, one empty for removal and one with the new wax filter.
Step 2. As I said, on the tool will be an empty pin and a pin loaded with a new wax guard. Push the empty pin into the old wax filter in the speaker and pull it out.
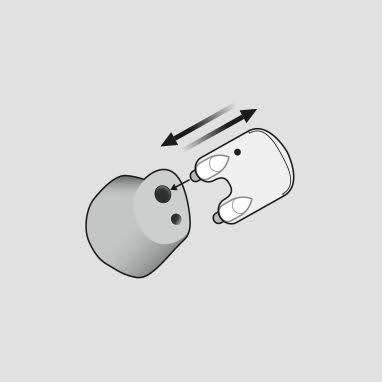
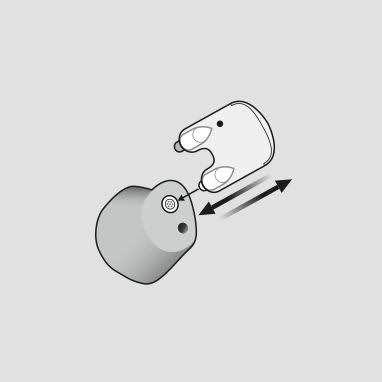
Step 3. Insert the new wax filter using the other pin, remove the tool (best way to do this is to kind of roll it off) and throw it away.
Here is a rather helpful video from Oticon on the very subject. It features the older No Wax filters for Oticon devices but the process is exactly the same.
To Find Out How To Change Wax Guards On Oticon Reciever In The Ear Devices, Go To The Next Page.